Input and controls
An essential element of any video game is input, typically through a keyboard, mouse, controller, or touch screen. In this article we'll explore the basics of keyboard input and implement an example.
Press the WASD keys to move the square
Anytime we interact with a web page, the page generates (or fires) a JavaScript event. By attaching an event handler to the page, we can capture the events and take the appropriate actions in our game. For handling keyboard input, the most important events are the keydown event, which is fired when a button on the keyboard is pressed, and the keyup event, which is fired when a key is released. Naturally, when we press and release a key, first the keydown event will be fired first, and then keyup right after.
To capture these events, we must register callbacks on the global window.onkeydown and window.onkeyup properties. To try it out, add the following code anywhere on your page:
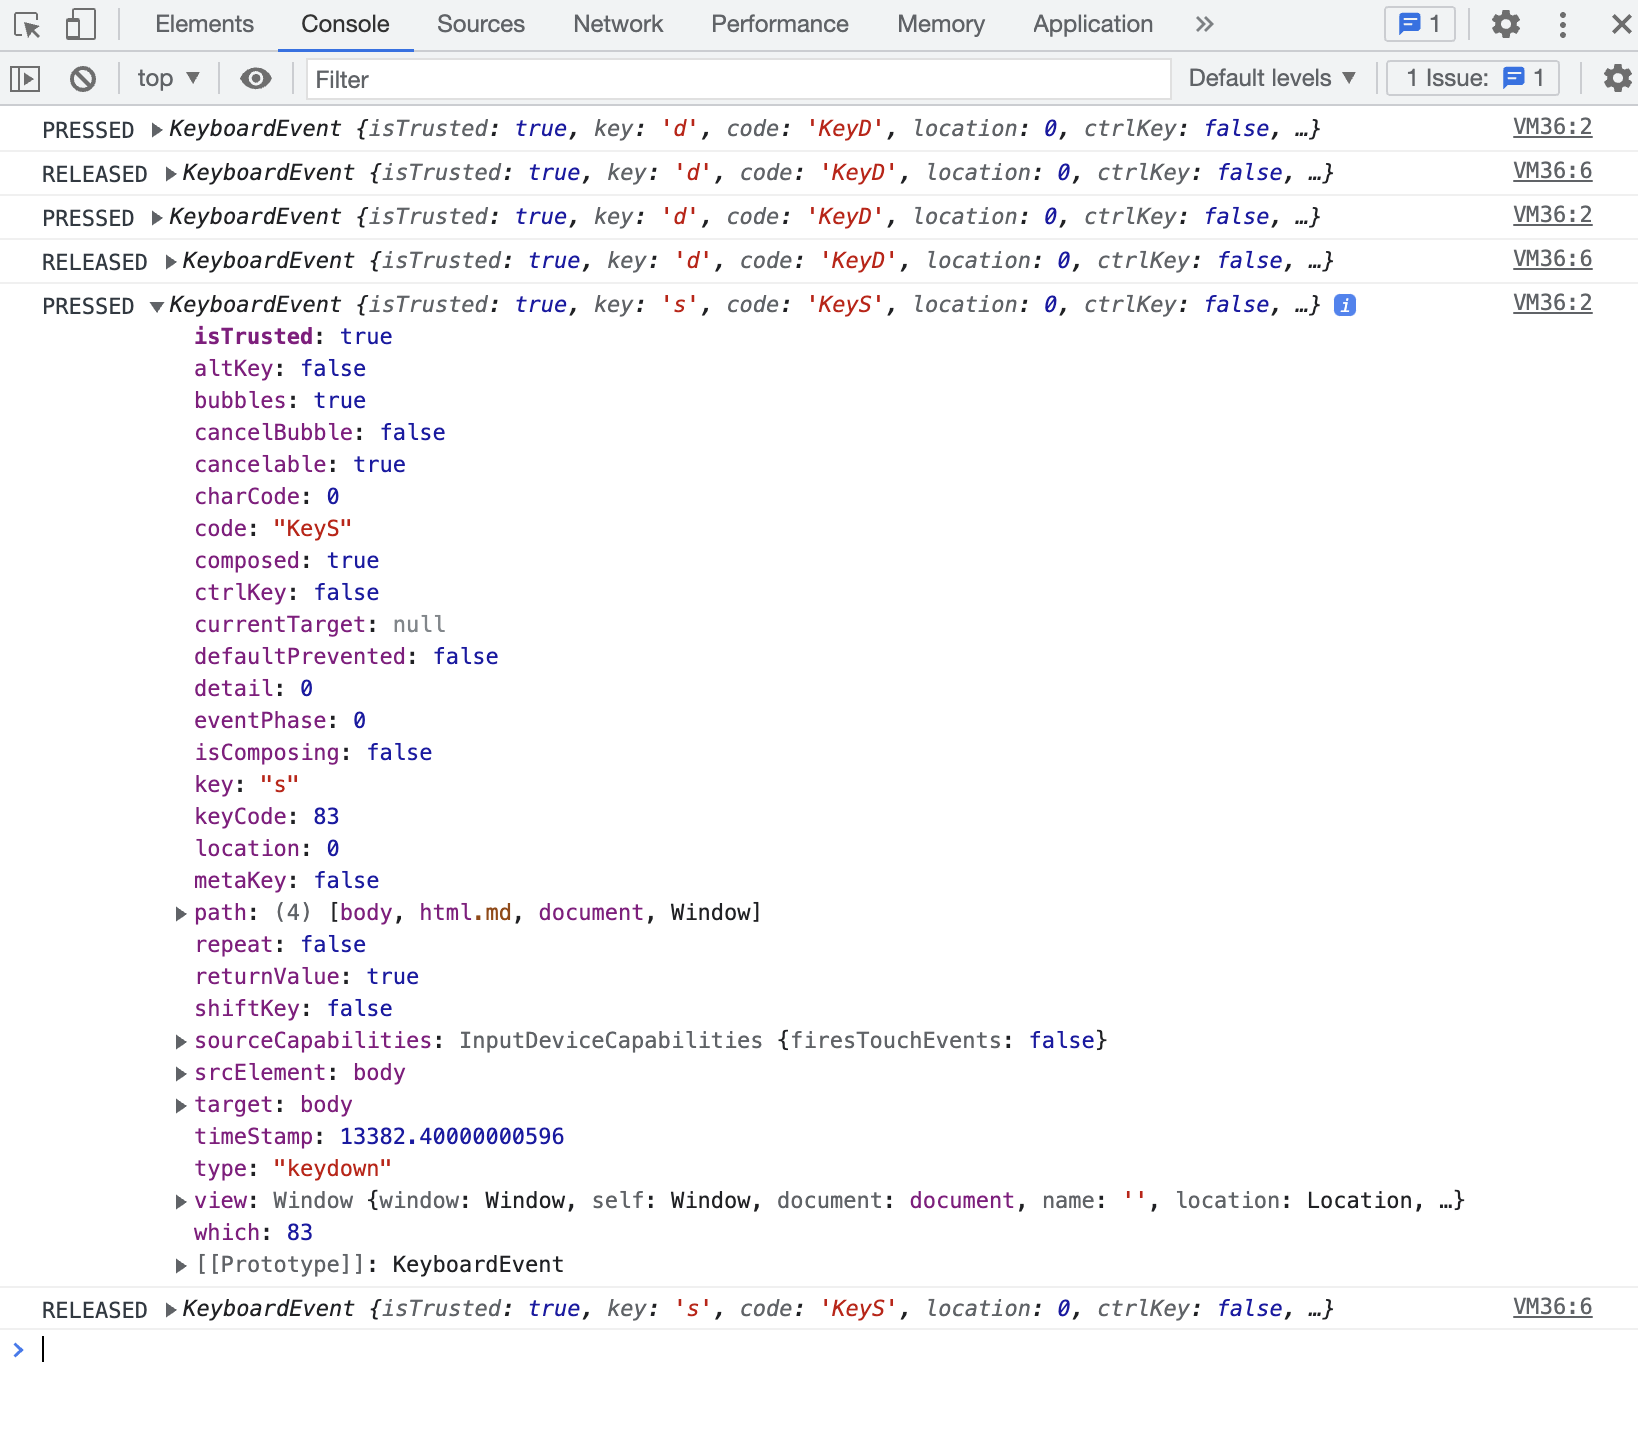
window.onkeydown = (ev) => {
    console.log("PRESSED", ev);
};

window.onkeyup = (ev) => {
    console.log("RELEASED", ev);
};
The generated events have a few interesting properties that we are very interested in. In particular, the code property is the one we need to examine, since it contains a string that represents the exact physical key that was pressed. For example, when we press the the W key, the event code property will have a value of KeyW.
Now that we can detect which key has been pressed or released, we can start integrating keyboard controls in our game. We'll use the ECS pattern which was described earlier. Let's create an input directory, and in that directory let's also create a keyboardInputComponent.js file. In this file let's put the following code:
import Component from '../ecs/component';

export default class KeyboardInputComponent extends Component {
    constructor(bodyComponent) {
        super();
        this.bodyComponent = bodyComponent;
    }
}
There not much here to explain except that the KeyboardInputComponent has a BodyComponent as a dependency. This is the BodyComponent that we'll be moving using the keyboard.
The component we just created will also need an appropriate system to handle it. Let's create a keyboardInputSystem.js file with the following code in it:
import System from '../ecs/system';
import Vec2 from '../vec2';
import KeyboardInputComponent from './keyboardInputComponent';

export default class KeyboardInputSystem extends System {
    constructor() {
        super();
        this.up = false;
        this.down = false;
        this.left = false;
        this.right = false;
        window.onkeydown = (event) => {
            if(event.code === "KeyW") {
                this.up = true;
            }
            else if(event.code === "KeyS") {
                this.down = true;
            }
            else if(event.code === "KeyA") {
                this.left = true;
            }
            else if(event.code === "KeyD") {
                this.right = true;
            }
        };
        window.onkeyup = (event) => {
            if(event.code === "KeyW") {
                this.up = false;
            }
            else if(event.code === "KeyS") {
                this.down = false;
            }
            else if(event.code === "KeyA") {
                this.left = false;
            }
            else if(event.code === "KeyD") {
                this.right = false;
            }
        };
    }

    update() {
        for(const component of this.components) {
            let horVelocity = 0;
            let verVelocity = 0;
            let velocityValue = 200;
            if(this.left && !this.right) {
                horVelocity = -velocityValue;
            }
            else if(!this.left && this.right) {
                horVelocity = velocityValue;
            }
            if(this.up && !this.down) {
                verVelocity = -velocityValue;
            }
            else if(!this.up && this.down) {
                verVelocity = velocityValue;
            }
            component.bodyComponent.velocity = new Vec2(horVelocity, verVelocity);
        }
    }

    createKeyboardInputComponent(bodyComponent) {
        const component = new KeyboardInputComponent(bodyComponent);
        this.components.push(component);
        return component;
    }
}
Let's go over the code and explain how it all works. Lines 8-11 contain the state of the controls, meaning we can examine these variables and immediately know which buttons are currently pressed or not. These variables also have names that are meaningful in our game, and represent which direction can the square move.
Lines 12-39 contain the two event handlers. Both work similarly, they check the code value of the event and set the appropriate variable to true or false.
Lines 44-59 are the ones that set the velocity of the moving body. If this.left is true and this.right is false, we give the body a negative horizontal velocity (move it to the left) and vice versa. Similarly, if this.up is true and this.down is false, we give the body a negative vertical velocity (move it upwards) and vice versa. We can set both the horizontal and vertical directions independently, which allows us to move diagonally as well.
We're now ready to use this system and component in our game. Let's update the index.js by putting the following code there:
import * as MainLoop from 'mainloop.js';
import KeyboardInputSystem from './input/keyboardInputSystem';
import PhysicsSystem from './physics/physicsSystem';
import GraphicsSystem from './graphics/graphicsSystem';
import Entity from './ecs/entity';
import config from './config';

let keyboardInputSystem = new KeyboardInputSystem();
let physicsSystem = new PhysicsSystem();
let graphicsSystem = new GraphicsSystem();

createPlayerRectangle(config.width / 2, config.height / 2);

MainLoop.setUpdate((delta) => {
    const deltaInSecs = delta / 1000;
    keyboardInputSystem.update();
    physicsSystem.update(deltaInSecs);

    keyboardInputSystem.deleteStaleComponents();
    physicsSystem.deleteStaleComponents();
}).setDraw(() => {
    graphicsSystem.update();

    graphicsSystem.deleteStaleComponents();
});

MainLoop.start();

function createPlayerRectangle(posX, posY) {
    let entity = new Entity();
    let bodyComponent = physicsSystem.createBodyComponent(posX, posY);
    let graphicsComponent = graphicsSystem.createGraphicsComponent(bodyComponent);
    let keyboardInputComponent = keyboardInputSystem.createKeyboardInputComponent(bodyComponent);
    entity.attachComponents(bodyComponent, graphicsComponent, keyboardInputComponent);
}
The important thing to note in the above code is that the keyboardInputSystem is the first thing that runs in each frame. If we handle the controls at a later time, we could run into the situation where some parts of the game loop run with old controls and some with new ones. If the controls are handled at the end of the loop, they'll always be at least one frame behind, making our game a bit unresponsive, and for this reason the controls are always handled first.
We're almost ready to make a complete game. In the next chapter, we'll explore how to handle cases when two bodies touch each other and what do to when that happens.